Ok, lots of words in the title, I know, but it’s not really all that complicated to make.
I was in a creative mood last night, and I’d just read a post from Elise at Simply Recipes describing a recipe for Chile Verde. Pig is pretty high on the treif list, but I love tomatillos, and hot peppers are my new favorite food, so I figured I’d take a stab at making the dish sans pork — which basically amounts to a yummy and versatile green sauce. I made several adjustments which I’ve spelled out in the recipe (below).
Now, tilapia en papillote.
“En papillote” is French for “in paper.” This cooking technique involves creating a steam packet out of parchment paper, which seals flavors and juices into whatever steams inside. I ususally layer a protein (fish, meat, tofu, even) with fruit and/or vegetables, spices, salt and pepper, and just a few dashes of sauce or scented oil, depending on the recipe. Last week, my mother served salmon en papillote with peaches, julienned carrots and red peppers, and a dash of sesame oil — simple and absolutely delightful.
The technique is a very healthy way to cook: it requires no oil, and ingredients are cooked just to doneness, so that they retain most of their nutrients. It’s also relatively easy and quick: Just place the fish on the parchment paper, top with the other elements (or place them beneath the fish), fold up, and bake in the oven. Finally, en papillote makes for a beautiful presentation, as the fish and all its accoutrements are unwrapped and plated tableside. I know, it sounds like a lot of fussing, but it’s really not that bad. Think of it as a ziploc sip n’ steam bag but it’s cheaper because it’s just a piece of paper. Plus, it won’t leak dioxins into your dinner the way plastic does. One rule of thumb about en papillote cooking: everything you cook inside the paper must have more or less the same cooking time. This means that if you’re including carrots, potatoes, or other starchy things that take a while to soften, you must slice them very thinly so that they will cook more quickly. When you make this (yes, you will make this), let me know how it goes.
 Chile Verde Sauce
2 Anaheim (or other) chiles — Elise uses jalapeños
3 tomatillos, husks removed and cleaned well
1 small yellow onion, diced
3 cloves of garlic
salt
olive oil
Put tomatillos and garlic cloves under a broiler for about 12 minutes, until the tomatillos’ skins are a browned and the flesh is soft. Remove, and allow to cool. Meanwhile, sauté the onions in the olive oil over low heat, until soft, translucent and caramelized.
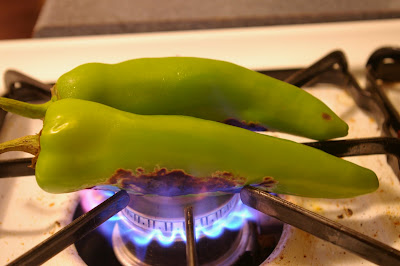
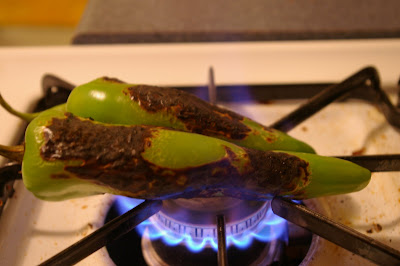
Roast peppers naked on a gas stove (as seen above — yowza!) until their entire skin is charred. Put in a peper bag and allow to steam for a couple minutes; then remove, run under water, and slide the skin right off, exposing the flesh of the pepper. chop coarsely.
Put the tomatillos in a blender and pulse. Add, then chiles, and season liberally with salt. Transfer to a bowl and store, covered, in the fridge for up to a week.
Tilapia en papillote with purple potatoes
serves 2.
2 filets of tilapia
2 pieces parchment paper, about three times the size of the filets
2 purple potatoes
1 lemon
salt and pepper
buckwheat honey
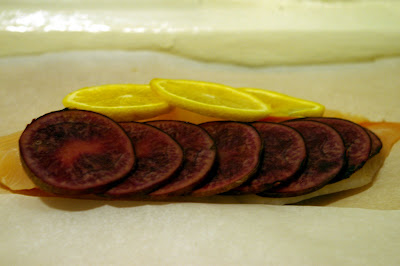
Lay tilapia filets in the center of the pieces of parchment paper.
Slice the potatoes VERY thinly (otherwise they will take longer to cook than the fish)
Slice the lemons. Stack the lemons and the potatoes in a domino-effect on top of the filet (I did them separately, but one may alternate them also for a more exciting presentation.) Alternatively, place the potatoes beneath the fish and the lemons on top.
Season with salt and pepper, and drizzle 1/2 a teaspoon (max!) of buckwheat honey atop each filet.
Wrap the filets as follows: (Like my elementary school drawings?)
Step 1: place fish in the center of paper with potatoes, lemons, salt, pepper and honey.
Step 2: fold the LONG sides of the paper over the fish toward the center so that they overlap.
Step 3: making sure that the paper stays overlapped, fold the short ends BENEATH the fish toward the center. In the finished packet, the fish should be resting on the two short sides of the paper (folded so that they’re each in a double layer), keeping the packet closed.
Ok, that was the hard part. Now put the packets on a baking sheet, and insert into a 350-degree oven for about 15 minutes. You may have to leave them in for 20, depending on the thickness of the filets. I always open my own to check it so that I don’t serve anyone accidentally undercooked fish.
That’s basically it: for this dish, I drizzled a bit of honey over the chile verde, then plated the fish atop the sauce, and garnished with a sliced pear to complement the acidity of the chile verde. I’d probably skip the honey on the chile next time, as it tends to overpower the flavor of the chile.
*Phew!* enjoy.
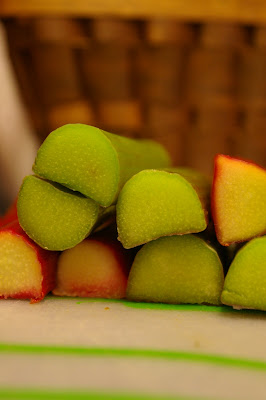
 Are you a squash hater? Please don’t be. Squash get a bad rap among carnivores for being a lame substitute for meat; it gets boiled, mashed, sugared, buttered, and baked into squash soufflé, yet so many people refuse to eat it as is. Well, if butternut and acorn and spaghetti squashes don’t do it for you, delicata is a wonderful last resort. It has a thinner flesh than other squash varieties, and the inside has a crevice running the length of the squash (as opposed to the small crevice at only one end of a butternut) that can be filled with all sorts of deliciousness. As for the flavor, it’s simply remarkable. Delicata is buttery, nutty, and smooth.
 Delicata Squash


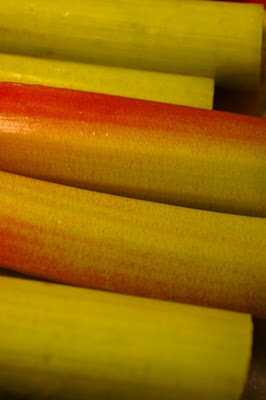 When I got my CSA box this past week, I was pleasantly surprised to find rhubarb among the contents. I later realized that this was because I had ordered rhubarb, then forgotten about it…but still, what a pleasant surprise! I’m entertaining this weekend, and rhubarb is a great place to start.
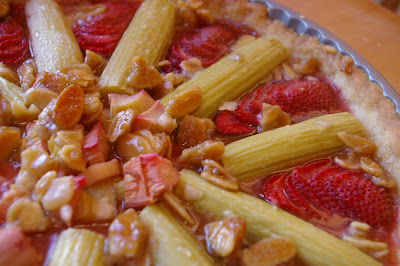
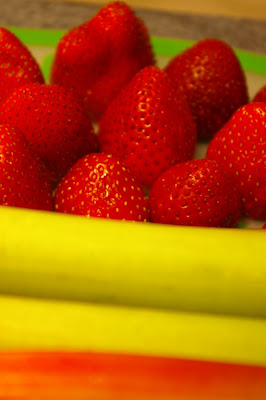 I promise to post more rhubarb recipes as more of it pops up in my CSA box. For now, this tart is a riff on my usual strawberry rhubarb pie recipe. Unlike pie crust, tart crust is sweet and less crumbly. While my pies usually have a lattice or crumble top, this tart is open-faced, garnished with a simple almond streusel. I do enjoy a good lattice crust, but this tart is an opportunity to show off your fruit-arranging skills. What? Yes, your fruit-arranging skills.
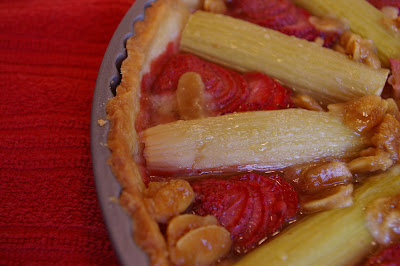


