 It is super-duper chilly this morning and fall is finally setting in. Crisp air in my face and the crunch of leaves beneath my feet give me a serious hankering for some pumpkin soup!
But this post is about tartlets.
Everyone makes muffins; nobody makes tartlets. Yes, they’re not as quick and easy to make as muffins are, but they’re so much cuter and (IMHO) more delicious. Can’t compare muffins and tartlets? Yes, yes I can. I just did! Tartlets > Muffins. Make some tartlets!
Here’s the good thing about the tartlets I make: they’re delicious. Ok, just kidding — they’re also not as time-consuming because the steps overlap with each other, as follows:
make the dough (about 5 minutes in a food processor)
make the filling while you refrigerate the dough
make and bake the tartlet crusts while you refrigerate the filling
let the tartlet crusts cool while you get the filling ready to pipe
fill tartlets and serve
See? Not so bad.
And the lemon curd filling is really not too hard to make. It does involve some pot-watching and some vigorous whisking, but it’s worth the effort; whatever extra filling you have after finishing the tartlets is wonderful eaten out of the bowl, just so.
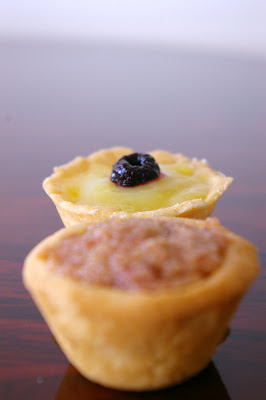
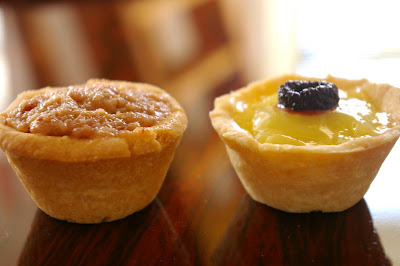
Today’s post is about the lemon tartlet in the background of the picture above; the tartlet in the front of the picture is a posting for another day.
Lemon Curd-raspberry tartlets
makes about 25 tartlets.
Tart Crust: taken from Tartelette
1 1/2 cups flour
1/2 cup powdered sugar
1 stick plus 1 Tbsp unsalted butter, chilled and cut into small pieces
1 egg yolk
Blend dry ingredients with a hand or stand mixer. Add butter and blend until mixture resembles coarse meal. Add egg yolk; blend until dough comes together. Wrap in plastic, and refrigerate while preparing ingredients for the tart.
While the dough refrigerates, prepare the curd:
zest of 2 lemons
1/2 cup lemon juice
1/2 cup sugar
2 eggs
1. Bring the zest, lemon juice and sugar to a simmer in a small saucepan.
2. Meanwhile, beat the 2 eggs until light.
3. When all the sugar has dissolved, add some of the hot lemon juice mixture to the eggs by the spoonful while beating the eggs, to temper them (in order to ensure that they don’t get scrambled.)
4. After you’ve added about 10-15 spoonfuls of the hot liquid and successfully incorporated it, pour the egg mixture into the saucepan with the rest of the lemon juice mixture, and bring to a simmer (not a boil) over medium heat until it thickens, about 5 minutes.
5. Transfer to a bowl and refrigerate until cooled completely, at least 1 – 1.5 hrs.
Back to the tarts…
After about half and hour, the tart dough should be just chilled enough that it can be worked with, but will not disintigrate. Take a walnut-sized piece of the dough in your hand, roll it gently into a ball, and, using your thumb, press it into a tartlet mold (in my case, I have a tartlet pan wth 24 molds). Try to ensure that the dough is spread evenly throughout the mold. This will make for even baking.
“Dock†the dough by spearing each tartlet a couple times with a fork – this ensures that they’ll keep their shape as they cook. Bake the empty tarts in a 350 degree oven for 10-15 minutes, until golden.
Assembly:
Scoop cooled lemon curd into a plastic bag, and cut off the very tip of the bag. Hold the bag just above the inside center of a tartlet, and squeeze, raising the bag as the tartlet fills. Repeat for each tartlet.
Top with either fresh raspberries or (as I did) frozen raspberries that I cooked down with a bit of sugar.
Enjoy!


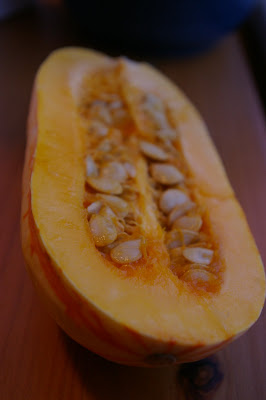 When I was young, squash seeds were a go-to fall snack in my house. They came in all shapes and sizes: butternut, acorn, delicata, pumpkin, etc. As soon as the weather was cool enough for squash, seeds would start to appear in Tupperware containers on the kitchen counter. As far as I remember, there was only one flavor: plain, with a bit of salt sprinkled on top.


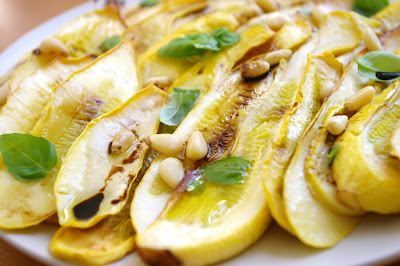 Yellow Squash with Basil and Pine Nuts